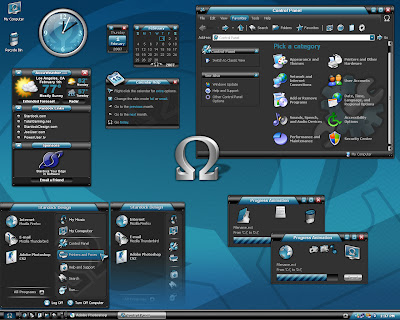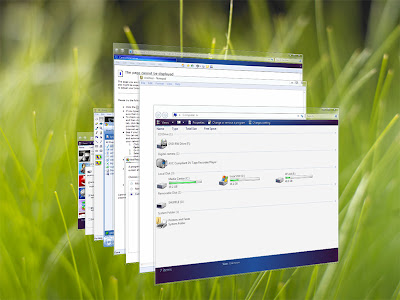
Well, lets face it. I don’t want to jump to Vista Bandwagon just now but I envy the way it looks. There are ways to hack your stable and trusted Windows XP to look and behave like Vista.
1. First you need to find out which Service Pack you are running. To do this simple press the Windows flag key+Pause/Break key. This is going to open the system properties window. Here it is going to say which service pack you are running
2. Now you have some downloading to do. First get: The appropriate Uxtheme.dll file If you are running Service Pack 1 then get this file.If you are running Service Pack 2 then get this file.
3. Unzip the file to your desktop
4. Now you need to download the Replacer(I recommend getting a stable version). The replacer efficiently replaces your system files and is supposed to be completely safe. This program also backs up your file in case you need to revert the changes.
5. Unzip the Replacer to your desktop. Make sure you read the “readme” because it has some important tips on how to revert those changes that you made. Now you are ready to replace your uxtheme.dll file
1. Now double click on the replacer file (replacer.cmd)
2. Then it will ask you to drag and drop the original system file you want to replace. So go to the System32 folder and somewhere near the bottom you are going to see the uxtheme.dll file. Drag and drop it into the window. Note: your computer may have more than 1 uxtheme.dll file but usually the file that you computer is using is the one in the system32 folder. (usually the location for your Uxtheme.dll file is C:\WINDOWS\system32\uxtheme.dll)
3. Press Enter
4. Then it will ask you to drag the file you want to replace. Open the folder with the downloaded file and drag and drop the file into replacer.
5. Now it will ask you to confirm that you want to replace the files or not. So double check and then press enter.
Replacer will now swap your original file with the new one. Now restart your computer. Congratulations you can now use custom msstyle themes on your computer. Which is going to make your computer look super cool! To change your theme just right click on desktop» properties» appearances tab» Windows and buttons If the above method doesn’t work then don’t loose hope. Just download this multipatcher (no matter what service pack you have) and it might do the job for you! In case you are looking around for some Visual styles and themes here are some sites that might help you in the quest for the perfect style for you:
If you are unsure and want some more proof then you can find some here at uneasysilence.com
These themes will make your computer look like Windows Vista for sure. So… go ahead and download it. Then unzip or copy it to C:\WINDOWS\Resources\Themes All right now you can change your computers theme to the Vista theme you chose.. There are many msstyles themes out there that look super cool and look like vista/longhorn. You can also get shell packs and windows blinds themes but some people claim that this can mess up your computer badly. The theme that I found works best is VistaXP by -kol! (but it was so popular that MS got it removed).
some More Vista Components :
Changing the Wallpaper
There are lots of Vista wall papers available… chances are that you have one included with your theme as well. If you don’t then you can try your luck at
WinMatrix’s great post for Vista wallpapers. If not then you can always search on
Google for Vista Wallpapers. If you want you can also get this wallpaper which also a CoolGrass wallpaper by ApacheUser plus it has the Windows Vista logo on it!
Changing the cursor
You can download the aero cursor pack
over here. Just read the read me file supplied and enjoy. Additionally, you can go to
How to change your mouse pointers article and change your mouse pointer to the 3D-White (system scheme), it looks very similar to the original cursor in Vista
Getting Vista-ish applications
Now once you are done that. And you like some transparency on your computer get these two very cool tools.
Vista Explorer: Something like the original Vista explorer but for XP and plus it has….. transparency. YES! IT IS TRANSPARENT! Just like the original one.
Internet Explorer (transparent version!): This is also very similar to the real internet explorer. Plus the internet explorer button on the task bar says internet explorer 7 (good for fooling people)! You can also get the real IE 7 (no transparency though) Now your system should look like Vista for sure, but why stop when you have come so far?
Fine tuning
After that, fine tune your font settings and turn on ClearType fonts with the ClearType Tuner PowerToy . Since the real Vista uses the font ‘Segoe UI’ which is a cleartype font, you can mimic the real fonts by using ClearType. However, some themes already come with the Segoe UI font so don’t forget to enable it while you are using it.
Shell Packs
If you really want to get shell packs to do what you can already do on your own then here are some of them:
Please keep in mind that the shell packs don’t customize your computer to look like the latest Vista/Longhorn builds, so your computer might not look like the recent Vista versions.
The Vista Sidebar
Longhorn Sidebar into XP and put that on your computer too. And when you are done that you can start celebrating! In fact you can claim that you have Windows Vista already, and nobody will doubt you. One last step enjoy and don’t forget to show-off your new look!
MY NEXT TOPIC WILL BE ON??

Some cool Tips eh ?
i-hackedwithtech: Windows XP, Tips.....
This topic is ment for ETHICAl hacking!


![]()


![]()
 Note: If you really want to display some of the advanced visual effects Windows offers, you should click Custom and select the required effects .
![]()